Got a box of old diecast cars gathering dust in the attic? Don’t let them languish! With a little time and effort, you can restore these miniature marvels to their former glory. Whether it’s a classic muscle car or a futuristic spaceship, bringing these little treasures back to life is a rewarding hobby. This guide will walk you through the process, step-by-step, so you can get started on your diecast car restoration project.
Assessing the Damage
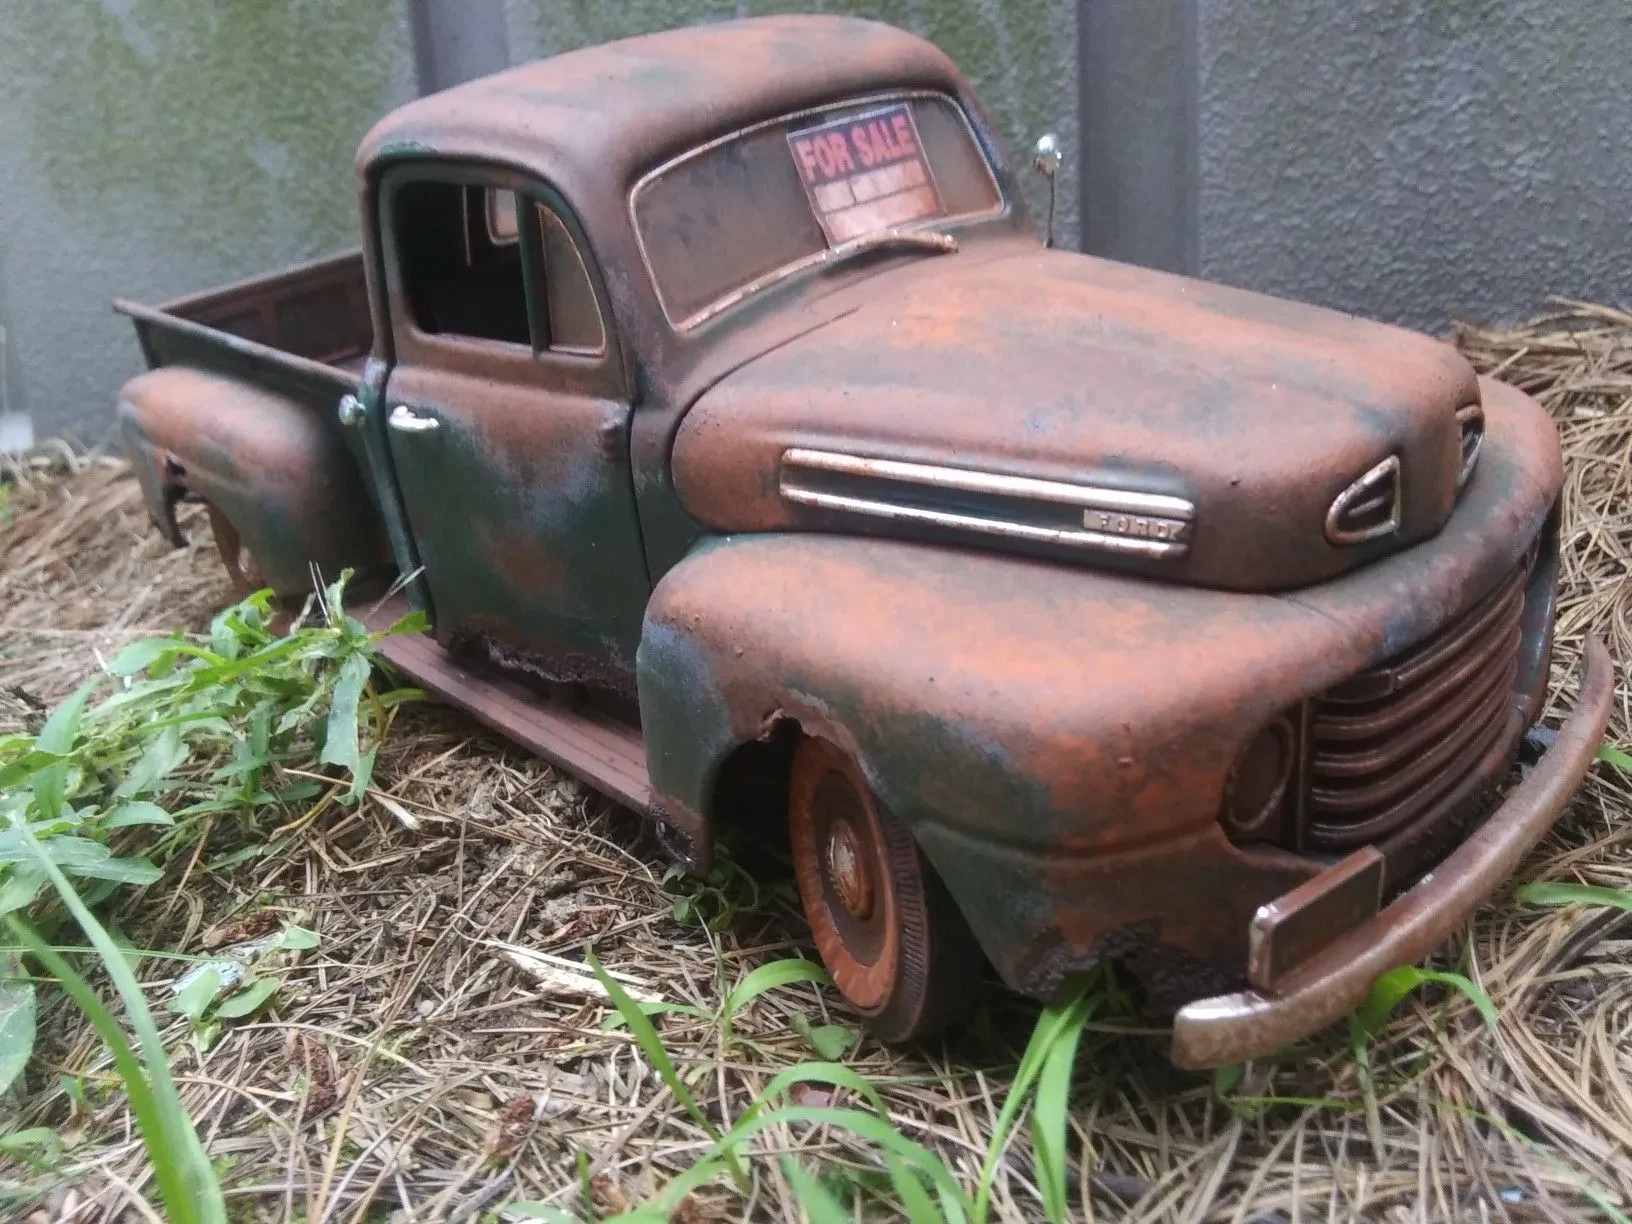
Before you dive in, take a good look at your cars. What kind of damage are we dealing with? Is it just a light dusting, or are there more serious issues like scratches, paint chips, or broken parts? Knowing the extent of the damage will help you plan your restoration strategy.

The Basic Cleaning
For most cars, a good cleaning is the first step. Start with a soft brush to gently remove loose dirt and debris. For more stubborn grime, a soft toothbrush and some mild dish soap mixed with warm water can work wonders. Remember to rinse thoroughly and dry completely with a soft cloth. Avoid harsh chemicals or abrasive cleaners that could damage the paint.

Pay close attention to hard-to-reach areas like the grill, headlights, and taillights. A cotton swab dipped in isopropyl alcohol can help clean these tricky spots effectively.
Tackling Scratches and Chips
Minor scratches can often be buffed out with a polishing compound specifically designed for diecast models. Apply a small amount to a soft cloth and gently rub the affected area in a circular motion. For deeper scratches or paint chips, touch-up paint is your best friend. You can find many sources for appropriate colors, but make sure it is specifically designed for diecast models.

Apply the touch-up paint sparingly and allow it to dry completely before attempting to polish it.
Dealing with Broken Parts
Broken parts are more challenging. If the break is clean, super glue or a similar strong adhesive can often fix the problem. Clamp the pieces together until the glue sets completely. However, for more complex breaks, you might need more advanced techniques or even replacement parts from a diecast model specialist or through online marketplaces.

Protecting Your Restoration
Once your diecast car is restored, you’ll want to protect your hard work. A protective coating, such as a clear acrylic sealant, can help prevent future damage and keep your car looking its best. Apply the sealant in thin coats, following the manufacturer’s instructions carefully.
Remember, patience is key. Restoration can take time, but the results are well worth the effort. Enjoy the process and the satisfaction of bringing your diecast cars back to life!
Essential Tools and Materials
- Soft-bristled brushes (various sizes)
- Mild dish soap
- Warm water
- Soft cloths (microfiber recommended)
- Cotton swabs
- Isopropyl alcohol
- Diecast model polishing compound
- Touch-up paint (appropriate color)
- Super glue or similar strong adhesive
- Clamps (small size)
- Clear acrylic sealant
Where to Find Parts
Finding replacement parts can be tricky, but there are a few avenues to explore. Online marketplaces like eBay and specialized diecast model forums often have sellers offering parts. Local hobby shops or model car clubs may also be able to help you track down what you need. Don’t give up hope – persistence often pays off!
